The Hidden Fact about Steady Blowing That is Holding You Back

How often have we pipers been told to “blow steady” or that our chanter notes or drones are “wavering” in and out of tune while we’re playing?
“Steady blowing” is a learned skill, and for most of us pipers it does not come naturally. As a matter of fact, most of the world’s population of pipers (young, old, beginner through advanced) STILL struggle to blow steadily even though it’s been in the back of our minds since the very first day we got the pipes out and started working on it.

The crazy thing is, it’s an amazingly EASY concept… right? Just keep the pressure in the bag the same at all times. It’s not rocket science. Sure, it’ll probably never be perfect, but it sure seems like anyone should be able to do this.
… So why can so few of us do it?
Well, one of the reasons is that we need a target, and we discussed the art of how and why finding the “tonal target” or “sweet spot” on your chanter reed is such an important aspect of getting a great bagpipe sound.
But there’s another important and largely hidden fact about steady blowing that holds back many pipers - and that is the fact steady blowing is not a “singular” issue - it actually has two distinct components. Blowing steadily requires two distinct skill sets to be mastered.
The first skill set we call “Physical Blowing Mechanics;” the ability to blow, squeeze, and transition between blowing and squeezing smoothly, with no detectable deviations in your bagpipe’s steadiness.
The second skillset is focused on eliminating “Mental Blowing Anomolies;” mistakes we make in our physical blowing mechanics as we navigate through the difficult fingerwork of the pipes.
In this article, let’s separate and focus on the first key skill set - “Physical Blowing Mechanics.”
Understanding Physical Blowing
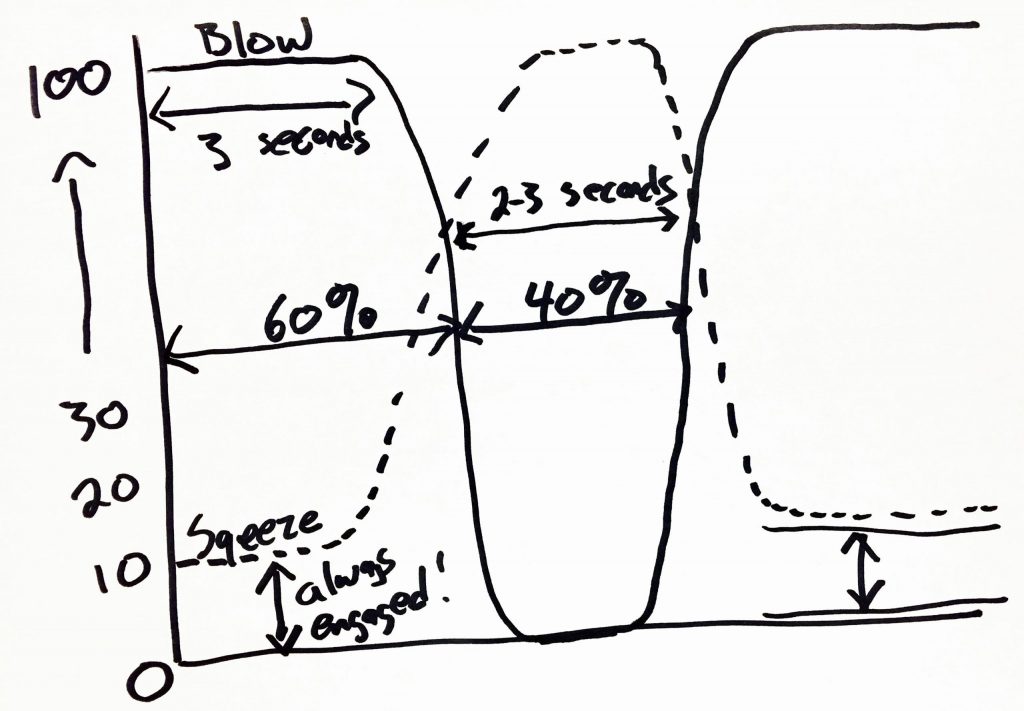
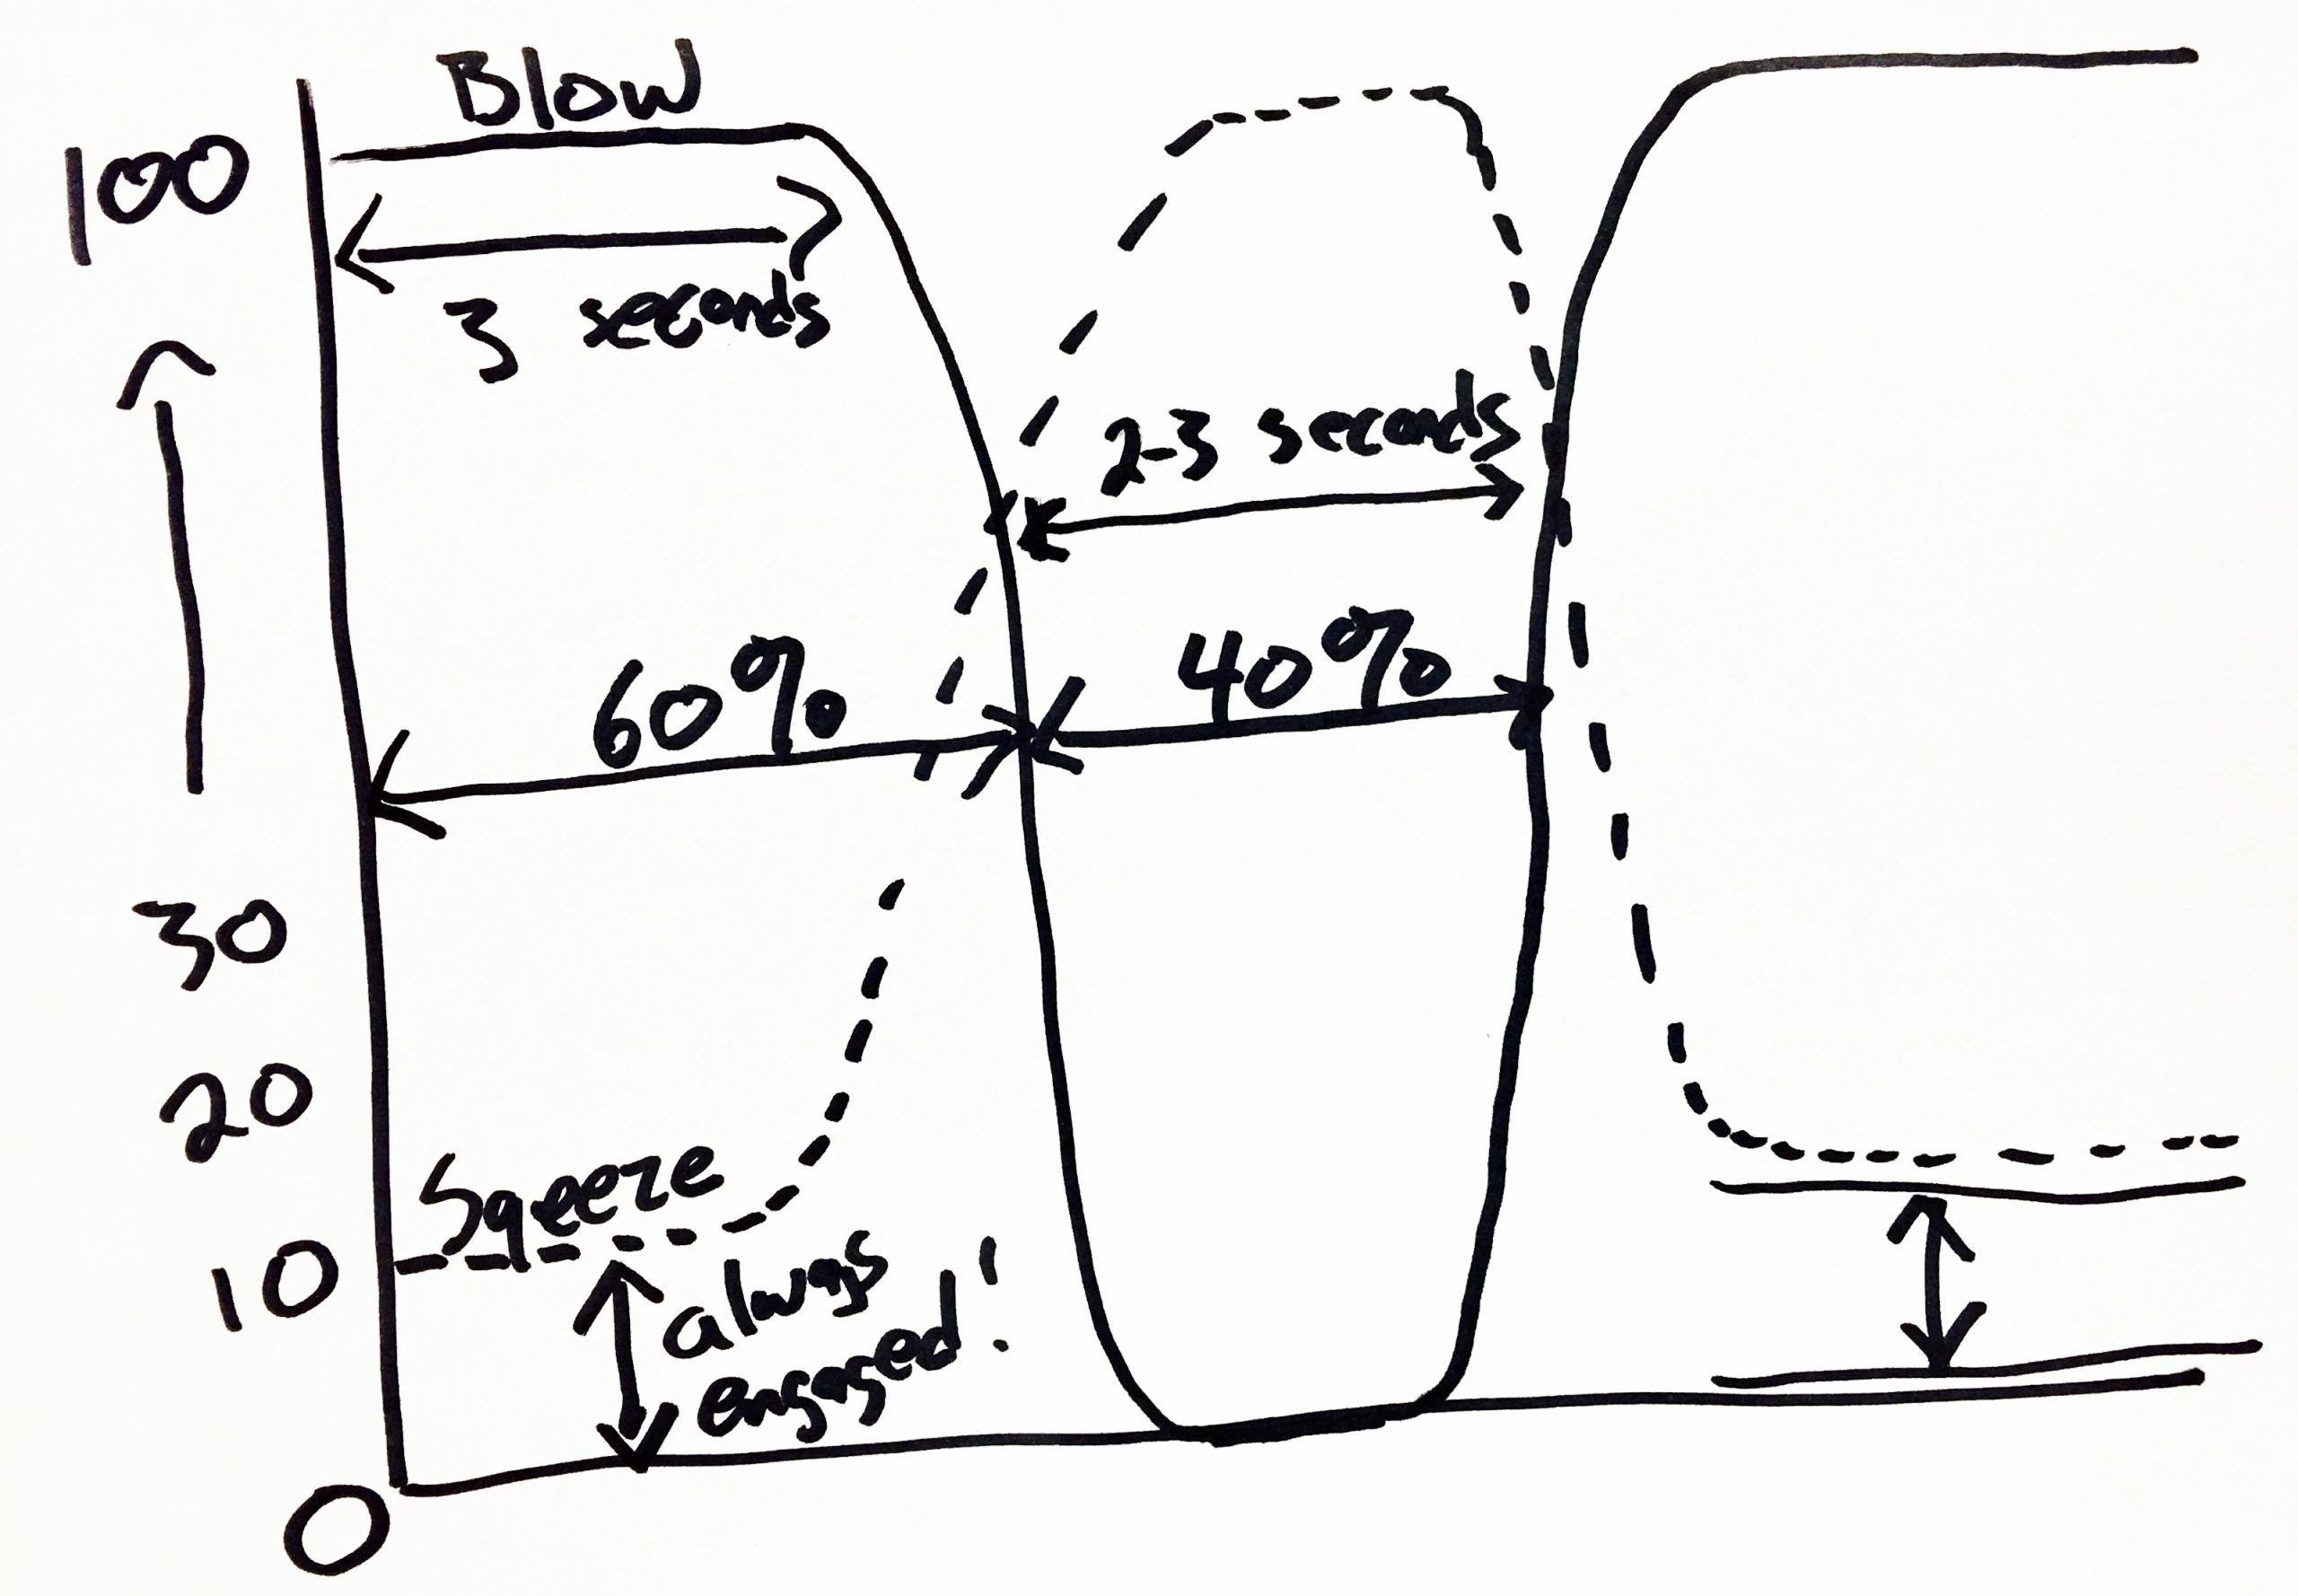
Let’s begin by acknowledging the four phases of blowing and squeezing. For simplicity, let’s start with 1) blowing into the pipe bag, 2) transitioning to squeezing as one starts to breath in, 3) squeezing with increased arm pressure to allow a full inhalation, and 4) another transition to blowing. All four of these actions must not only be coordinated, they must also become completely second nature. A piper merely can’t be thinking about blowing and squeezing while playing a tune. Steady blowing needs to become as automatic as normal breathing, which will then allow one to concentrate on playing on the beat, with all the correct notes and embellishments.
A previous article described how to use a manometer to determine the chanter reeds’ sweet spot, and that point should already be marked on your manometer. To practice physical blowing technique, for the first few sessions the chanter can be removed and the stock corked off. Attach the water manometer to one of the tenor drones, and strike in the pipes. The bagpipe should be comfortable to play. The pipe bag should fit the piper well, allowing for relaxed but upright posture. The blowstick length should be appropriate and individualized. Make sure that the blowstick’s inner diameter doesn’t restrict too much airflow. Lift the bag up into the armpit as high as it will go, and move the bag as far back as it will fit comfortably. The drones should go over the shoulder at about a 45 degree angle. The pipes should be able to be balanced with the bass drone on the collar bone. The elbow and upper arm should be the only areas of the arm that apply pressure to the bag. Using the forearm to squeeze will likely interfere with top hand agility because of increased tension in those muscles.
Stand straight, keeping the shoulders of equal height. Face the manometer and watch the water level rise as the pressure in the bag increases. Since there is no chanter at this point, all the focus should be on keeping the water level even with the previously marked sweet spot. During the blowing phase, be sure that the arm is still maintaining some pressure on the bag. Never take the arm off the bag completely. In fact, some suggest that the upper arm be positioned down “into the bag itself”, not just riding on the surface of the bag. As the blowing phase continues, watch the water level to see if the blowing is steady. At the end of the blowing phase, transition to squeezing. With coordinated effort, increase the arm pressure as the blowing stops. Watch the water level to see if it changes during the transition. As the arm increases its force to maintain pressure, take a deep breath in. Try to avoid rapid breathing cycles of huffing and puffing. Short cycles introduce a larger number of transitions, and steady blowing is harder to achieve.

At the end of inhalation, begin the transition to blowing once again. The arm must be relaxed just a bit as one begins to blow and “backfill” air into the bag, but the key is to maintain some arm pressure on the bag. But don’t try to blow against an arm that is vigorously squeezing, as doing so results in lack of coordination. Think of it as “blowing your arm away from your body, against a gentle arm force”. Try to make the blowing cycles as long as you can, but keep them of comfortable length. There is no magic “ratio” for how much time a piper should spend blowing or squeezing. But as a general rule, the longer the cycles, the better. As you blow through more and more cycles, continue to watch the water level in the manometer. Where in the blowing cycle does the water level suddenly rise? Does it abruptly fall at some point? Make a mental note to adjust what you’re doing wrong during the next cycle.
Surging pressure or drops in pressure can occur anywhere during the blowing/squeezing/transition phases. For example, as one begins to blow, lifting the arm too quickly away from the body will result in a sudden drop in pressure. Also, it is common during the squeezing cycle to apply too much arm pressure, resulting in surges. Pay special attention during transitions. Make the transitions as “fluid” as possible. By seeing the water move in the manometer, and linking those changes with what’s going on during the breathing cycle, the feedback for learning to correct the physical errors can be phenomenal.
Now that you’ve had a few sessions on the manometer without a chanter, practicing keeping the water level at the sweet spot, it is now time to practice steady blowing with the chanter back in place.
Roughly tune the pipes to a point they’re not a distraction, and hook back up to the manometer. Strike in and bring the pressure back up to the sweet spot while at the same time play only a single note, such as Low A. Stay on that one note for several complete breathing/squeezing cycles. It’s a bit more difficult, isn’t it, than with only the drones? Again, focus on where in the cycle that surges or dips occur. They tend to be in the same spots of the blowing cycle, so that’s an opportunity to adjust your blowing or squeezing.
The building blocks of learning physical blowing should really be practiced only while playing a single, static note on the chanter. Why? Because as soon as we introduce fingerwork to the equation, we can no longer be sure that fluctuations in pressure are due to physical errors. They may be caused by subconscious “Mental Blowing Anomolies” that we accidentally insert into our blowing process due to the changes in our fingers. As you’ll recall from the beginning of this article, “Mental Blowing Anomolies” are the second of the two key components that we need to understand and develop in order to truly become good, steady blowers.
Click Here to Learn More about Mental Blowing Anomalies
Getting back on track: the ultimate goal, of course, is to achieve an optimal tone by always blowing at the chanter reed’s sweet spot. However, no piper can maintain an absolutely steady water level. As a result, how would we define excellent, good, or mediocre blowing? The top pipers in the world can blow steadily, within half an inch (one centimeter) of the sweet spot, regardless of the tune being played with their fingers. One can be considered to be a “good” steady blower if the water level never fluctuates more than one inch above or below the sweet spot. Clearly, anyone whose pressure changes wildly fluctuate outside of those parameters has a lot of work to do. But practice will pay off.
Practicing steady blowing with a manometer should not occupy entire practice sessions. When getting started along the path to steady blowing, use the manometer for 5-10 minutes during a practice. But use it for a little while during every practice session, especially at first. Avoid the temptation to quickly jump into tunes with your manometer, unless you are already an accomplished steady blower. Focus on the simple things first. Play one note, then another, making adjustments with your blowing.
Expect it to take at least 20 sessions with the manometer to see real improvement in steady blowing. However, some improvement will occur right away just by being aware of the shortcomings of our physical blowing and squeezing prowess. Be patient. Steady blowing will come to those who become self-aware, and then endeavor to improve.
Download the Steady Blowing "Trifecta" Free PDF Guide

Click Here to download a free PDF eBook teaching you the Steady Blowing "Trifecta."


Is this video already a part of my membership?
Oh my gosh Andrew, the light came on! I have been struggling with chanter tone and steady blowing for 5 years! I am working on your Instrument Fundamentals course and when you said to blow to the sweet spot with AHAP being #1 priority, your blowing will naturally steady out and your tone will be better. Wow! ALL students need to hear that. The manometer, I have always thought, was a great tool. I just don't think a teachers know how to use it to it's full potential or incorporate it into learning the instrument. Maybe a different philosophy? I don't know.
My original band used those clunky stock pressure gauges. Too hard to use and just one more leaky spot! Anyway, THANK YOU! What a revelation! I now have a set and understandable goal which should help my tone and steady blowing a lot!
So glad it resonated Linda! Great to hear from you 🙂